← Alle Tutorials
Wiederherstellung eines Drive Image Backups (Systemwiederherstellung) mit Iperius
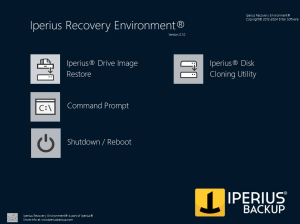
Mit Iperius können Sie eine Wiederherstellungsdiskette (USB oder zu brennende ISO-Datei) erstellen, die das Bootsystem Iperius Recovery Environment® enthält , mit dem Sie eine Maschine booten und ein mit Iperius erstelltes Disk-Image-Backup (Datei .VHD oder .VHDX) wiederherstellen können. Diese Funktion ermöglicht Ihnen eine Bare-Metal-Wiederherstellung, eine echte Notfallwiederherstellung auch auf anderer Hardware , ohne dass Sie eine Windows-Installationsdiskette, sondern nur die Iperius-Wiederherstellungsdiskette benötigen. Um zu erfahren, wie Sie ein Wiederherstellungslaufwerk erstellen, lesen Sie das entsprechende Lernprogramm . Siehe auch: Disk-Image-Backup, Disk-Klonen und P2V mit Iperius Sobald die Wiederherstellungsdiskette erstellt ist, legen Sie sie in die Maschine ein, die Sie booten möchten, d. h. die, von der Sie das Backup wiederherstellen möchten (um die Maschine von einem USB-Gerät zu booten, müssen Sie möglicherweise einige Einstellungen im BIOS oder Boot-Menü ändern). Die Maschine wird mit Iperius Recovery Environment® booten und ihre Schnittstelle ist unten dargestellt.
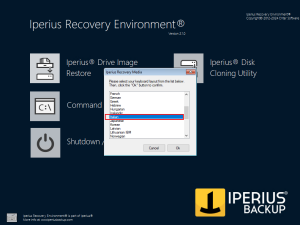
Hinweis : Bevor Sie die Wiederherstellungsoberfläche von Iperius Backup starten, ist es wichtig, das aktuelle Tastaturlayout auszuwählen, um zu vermeiden, dass die angeschlossene Tastatur in der Software nicht korrekt zugeordnet wird. Klicken Sie dazu einfach auf das Tastatursymbol unten links und wählen Sie das Tastaturlayout ( die Standardeinstellung ist US: US ). Bestätigen Sie mit der OK-Schaltfläche (siehe Abbildung unten).
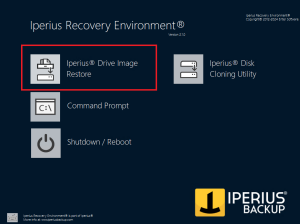
Nachdem Sie das Tastaturlayout korrekt eingestellt haben, können Sie das Wiederherstellungsprogramm starten, indem Sie auf die Schaltfläche „Laufwerksimage wiederherstellen“ klicken (siehe Abbildung unten):
Sehen wir uns nun die Schritte zum Wiederherstellen des Iperius-Disk-Image-Backups an.
1) Wählen Sie den Drive Image-Sicherungspfad
After launching the interface, you need to select the backup path, which should contain one or more .VHDX or .VHD files (virtual hard disks) and a .idi or .idicbt file (the configuration file with the necessary information to restore a full or incremental backup). Start by choosing the type of path where the image is located, using one of the two available options (see the image below):
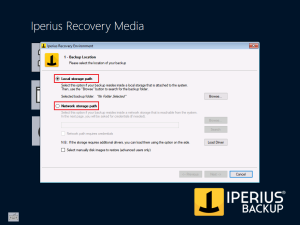
1a) Local Path: corresponds to a local path of the machine (hard drive, USB stick, or any mapped device as a drive);
2b) Network Path: corresponds to a network path accessible from the machine (NAS, shared folder, etc.);
1a) Select from a local path
Let’s start with the local path. After selecting “Local Storage Path,” click “Browse” and use the folder tree to find and select the .idi or .idicbt file present in the backup folder to restore (see the image below).
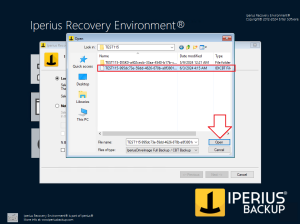
To confirm, simply click the OK button highlighted above. The path will be scanned, and if one or more backups are found, a confirmation message will appear (see the image below, right side). If no backups are found, a warning message will appear (see the image below, left side).
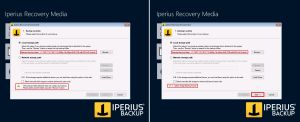
If backups were found, we can proceed by clicking “Next.”
1b) Select from a network path
If the backup is located on a network path, select “Network Storage Path” and enter the path of the folder containing the .idi file (you can also use the “Browse” button to view the network devices). Click “Search” to start scanning (see the image below):
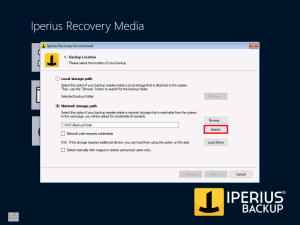
Again, after the scan, a confirmation message will appear if backups were found; otherwise, we will see a warning. The “Next” button will be enabled only if backups are found.
Setting network credentials: If the network path requires login credentials, select “Network path requires credentials” and, after clicking “Search,” enter the necessary credentials in the window that will open (see the image below).
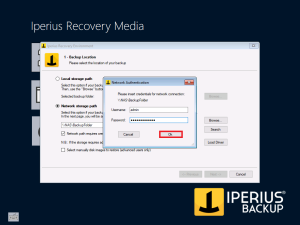
Once the correct path is selected, click “Next” to continue.
2) Select the backup to restore
One or more backups found in the selected path will be displayed (see the image below).
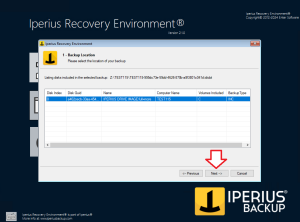
Each row corresponds to a backup, with its main information such as the backup operation name, computer name, included volumes, and backup type. Select the desired backup and click “Next” to continue. If the backup is Full or Patching, proceed to section 3. If the backup is incremental or differential, choose which version to restore.
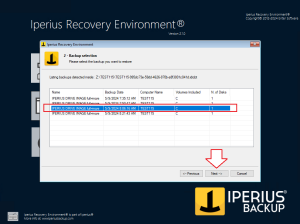
Choose the backup to restore and click “Next” to continue.
3) Select the restore mapping
Im Fenster „Zuordnung wiederherstellen“ müssen wir jeder wiederherzustellenden VHDX- oder VHD-Datei aus dem Backup eine Festplatte zuweisen (siehe Abbildung unten).
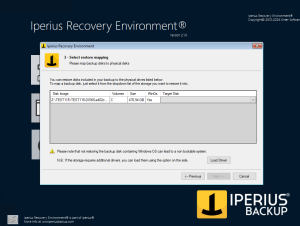
Wählen Sie die Festplatte für die wiederherzustellende VHDX-Datei aus und klicken Sie anschließend im Dropdown-Menü im Feld „Zielfestplatte“, um die Zielfestplatte auszuwählen.
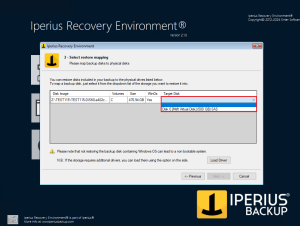
Jede VHDX-Datei wird auf die entsprechende ausgewählte physische Festplatte geschrieben. Klicken Sie nach Abschluss der Zuordnung auf „Weiter“.
4) Bestätigen Sie die Wiederherstellungseinstellungen
Im nächsten Fenster sehen Sie eine Zusammenfassung der Wiederherstellungszuordnung (siehe Abbildung unten).
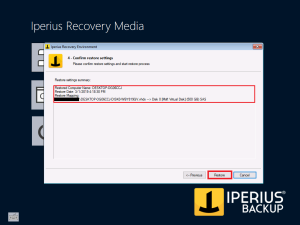
Wenn alles korrekt ist, klicken Sie auf „Wiederherstellen“, um die Wiederherstellung zu starten, oder klicken Sie auf „Zurück“, um zurückzugehen und einige Parameter zu ändern. Ein Klick auf „Wiederherstellen“ startet den Vorgang, und die Festplatte wird wiederhergestellt (siehe Abbildung unten).
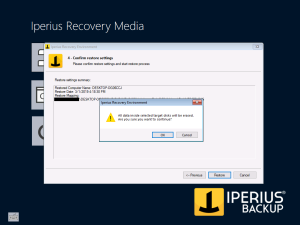
Achtung: Die Wiederherstellung überschreibt den Inhalt der physischen Zielfestplatte unwiderruflich.
5) Starten Sie die Wiederherstellung
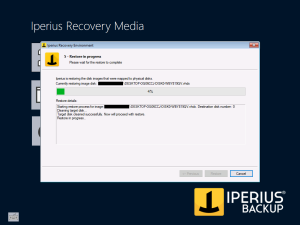
Der Wiederherstellungsvorgang beginnt. Zunächst wird die Festplatte formatiert und vorbereitet, anschließend wird das Image geschrieben (siehe Abbildung unten).
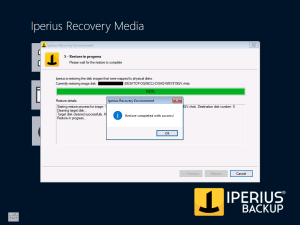
Klicken Sie nach Abschluss des Vorgangs auf „OK“ und anschließend auf „Fertig“.
6) Starten Sie das System neu
Klicken Sie abschließend auf die Schaltfläche „Herunterfahren/Neustart“ und wählen Sie „Neustart“. Entfernen Sie das USB-Gerät oder die Festplatte, von der Iperius Recovery Environment gestartet wurde, und bestätigen Sie mit „OK“.
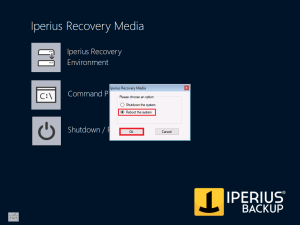
Der Computer wird neu gestartet und startet von der wiederhergestellten Festplatte.
Für alle Fragen oder Zweifel zu diesem Tutorial,
Kontaktieren Sie uns